How I Package Cake Slices (My Favorite Method)
Mar 13, 2026
There are so many different ways to package cake slices.
When choosing packaging, there are a few things I always consider:
-
Cost of the packaging
-
How it looks to the customer
-
How easy it is to transport
-
How quick it is to assemble during a busy sale
I’ve tried a lot of different methods over the years (I’m always experimenting over here), but this one has become my absolute favorite way to package cake slices.
It’s simple, clean, and protects your cake beautifully.
But first—let me tell you why I started selling cake slices in the first place.
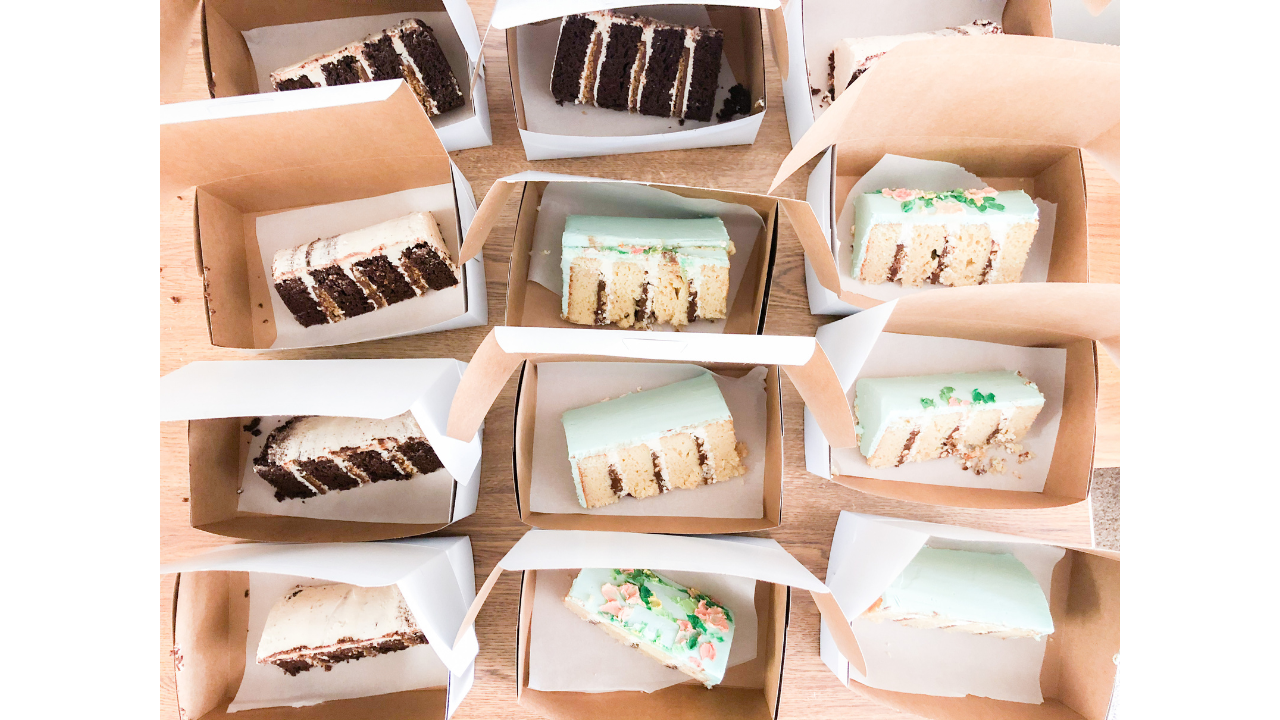
Slices of my smore's cake and nutella pretzel cake boxed and ready for pick up.
Why I Started Selling Cake by the Slice
When I was about four months into officially starting my baking business, I had a problem.
I didn’t have many photos for my portfolio yet, and I was still working hard to build my decorating skills.
So I was making practice cakes constantly.
The problem?
I didn’t want those cakes to just go to waste.
So one day I had an idea:
What if I sold them by the slice?
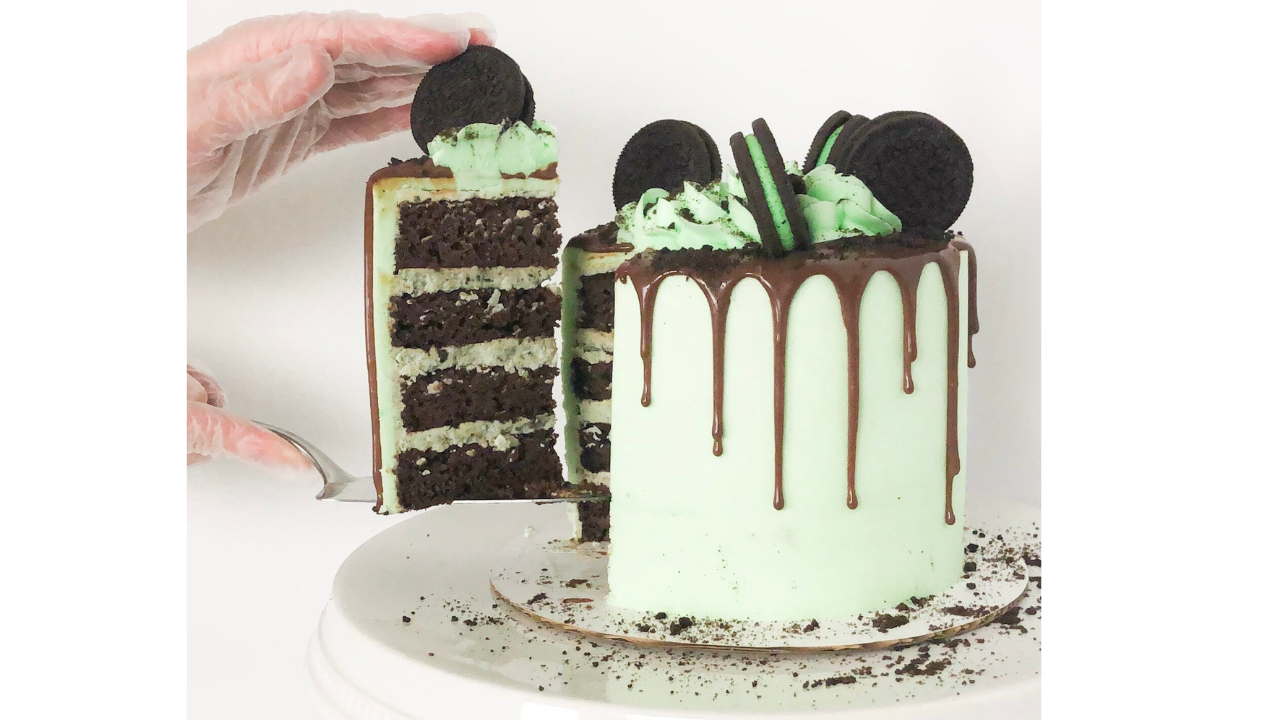
Slicing up my mint cookies n' cream cake for a flash sale.
The first time I tried it, I priced the slices at around $4 each.
They sold out almost instantly.
I remember thinking… Whoa.
So I did it again the next month.
I baked practice cakes, took my photos and videos, sliced them up, and posted a sale.
Once again…
Every single slice was claimed and Venmoed for almost immediately.
At that point, I realized I had stumbled onto something really valuable.
So I started collecting the names of people who wanted to know whenever I had extra slices available.
I called it my Cake VIP Group.
And it quickly became one of the easiest ways to make money from:
-
practice cakes
-
leftover cake from orders
-
extra batches
Even now, years later, I still sell cake slices a few times each year.
Sometimes it's at a farmer’s market, and sometimes I run a quick flash sale online.

My personal favorite cake slice flavor-- Turtle (Dark Chocolate Pecan Caramel Cake)
The Challenge of Packaging Cake Slices
If you’ve ever packaged individual cake slices for an event or sale, then you’ve probably experienced this moment:
You finish decorating the cake.
You cut the slices.
And then suddenly you realize…
Packaging them is the most stressful part.
You don’t want to:
-
smudge your buttercream
-
ruin clean edges
-
get frosting all over the box
And trying to carefully maneuver a delicate slice into packaging with your hands can feel like a high-stakes balancing act.
After trying several methods, I finally landed on a simple hack that makes this process so much easier.
My Cake Slice Packaging Hack
The trick is incredibly simple:
Place each slice on parchment paper before transferring it into the box.
The parchment acts like a little sling that lets you lower the slice into the box without touching the cake itself.
No smashed frosting.
No awkward hand angles.
No messy boxes.
How I Package My Cake Slices (Step-by-Step)
Here’s the exact process I use.
1. Assemble Your Boxes First

Start by assembling all of your boxes so they’re open and ready to go.
My favorite size for cake slices is an 8 × 4 × 4 inch kraft paper box.
This size fits a generous slice perfectly and still looks neat and professional.
I’ve ordered this size and type of boxes from both Amazon (affiliate link) and Webstaurant, depending on pricing and availability.
2. Cut Parchment Paper Rectangles
Next, cut rectangles of parchment paper that are slightly larger than the inside of the box.
Lay these out ahead of time so everything is ready when you begin cutting the cake.
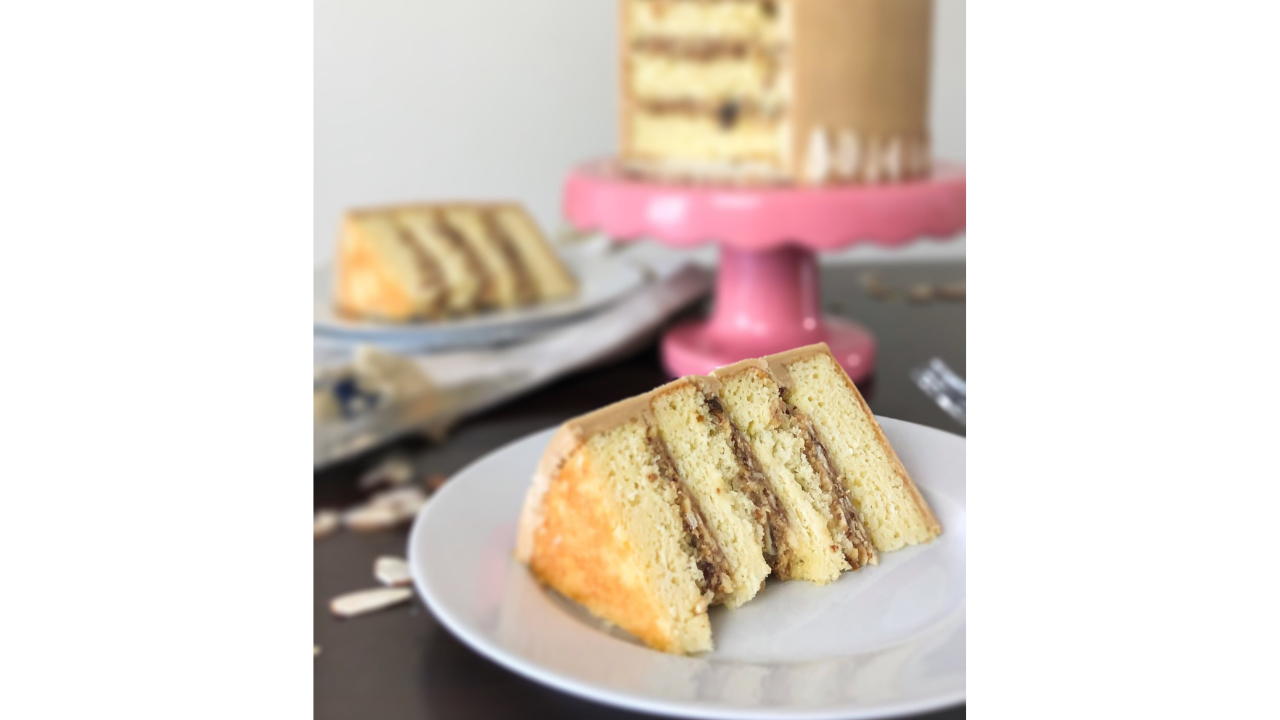
3. Cut Your Cake into Even Slices
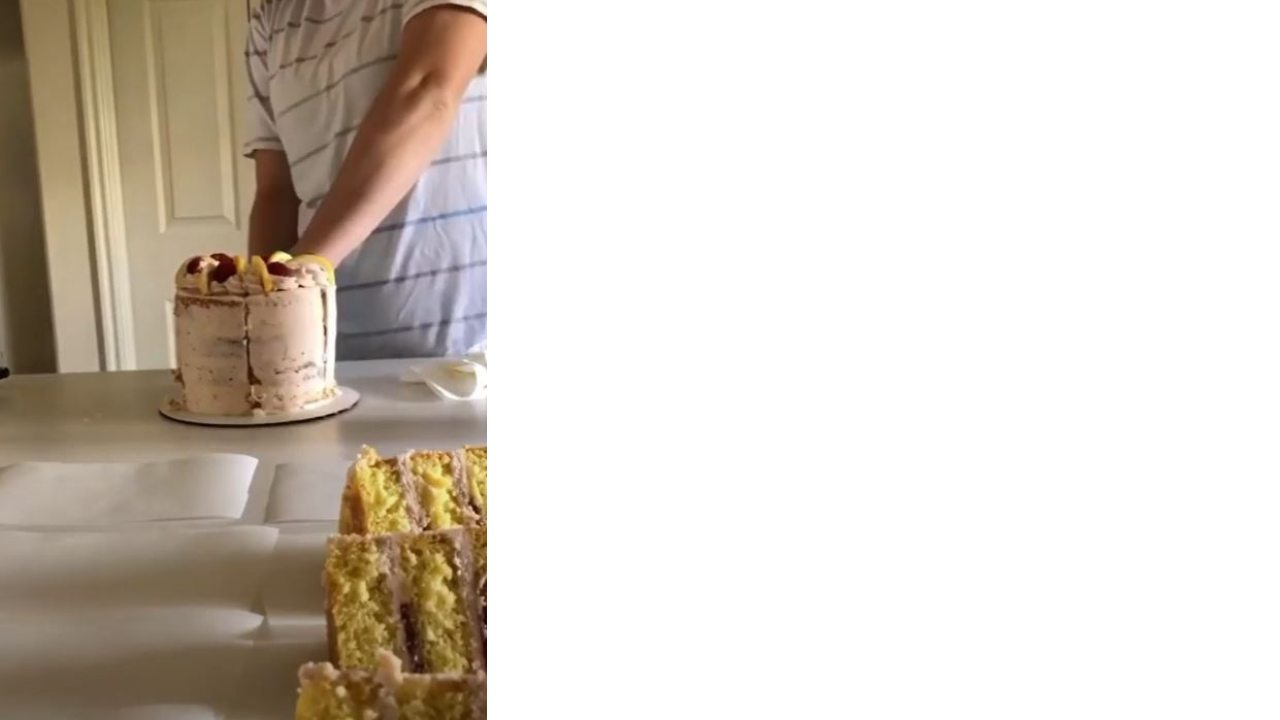
For a four-layer 6-inch cake, I typically cut six generous slices.
This creates a really satisfying portion size while still giving you a good number of slices to sell.
4. Place Each Slice on Parchment
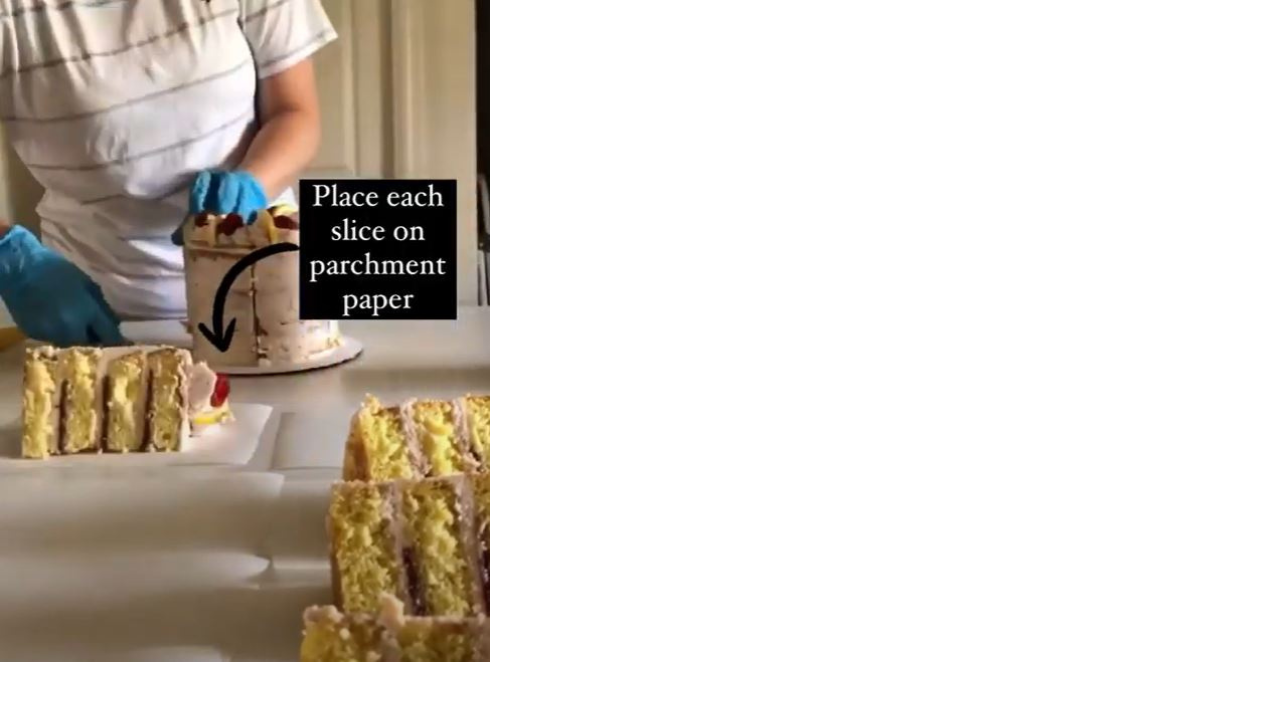
As you cut each slice, place it directly onto its own piece of parchment paper.
I highly recommend wearing food-safe gloves for this step. It keeps things clean and makes handling easier.
5. Lower the Slice into the Box

Now for the magic part.
Simply grab the edges of the parchment paper, lift the slice, and gently lower it into the box.
The parchment supports the cake so you never have to touch the frosting or sides.
It’s quick, clean, and keeps everything looking professional.
6. Close Boxes at the End

You can close the lids as you go, but if your hands have frosting on them I recommend waiting until the end.
Quickly washing your hands before closing the boxes helps prevent oil marks or smudges on the kraft packaging.
My Favorite Packaging Supplies
I buy most of my packaging supplies in bulk on Amazon, especially when I know I’ll be using them regularly for markets or slice sales.
These boxes are also what I use every year for farmer’s markets.
👉 Check out my favorite packaging supplies here
(Amazon affiliate link)
A Farmer’s Market Tip
Here’s something that surprised me the first time I tested it.
Last summer I sold these cake slices at an outdoor market where it was nearly 100°F.
I stored the boxed slices inside a cooler with just two small ice packs, and even with the cooler sitting in direct sunlight they held up beautifully.
So if you’re worried about selling cake slices at warm outdoor events, this setup works really well.
Selling cake slices has been one of my favorite little strategies over the years.
It helps you:
-
make money from practice cakes
-
reduce food waste
-
build excitement with customers
-
and give people a chance to try your flavors
And with the right packaging method, it can be quick and stress-free too.
I hope this helps you, my baker friends! 😘

